Power Box V3 Complete
It’s been a while since my last post, but I haven’t been lying idle. I have actually got off my backside and completed version 3 of the powerbox that I mentioned in the last post. In this post I will attempt to show my efforts as I went along. I apologise for some of the awful photos as I didn’t think as I went along to document it properly so I’ll be doing this with what I took as I went along.
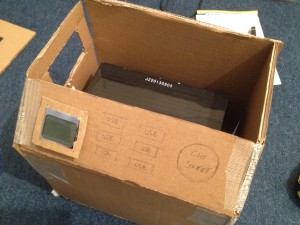
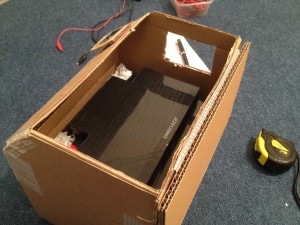
The cardboard mockup
You already saw this from the last post but I began this project with a cardboard mockup of what I wanted the final outcome to be. In the end my final product was a few inches bigger in all 3 axis to accommodate tolerances and to make sure I did have room for everything. I am glad I opted for this as it turned out well.
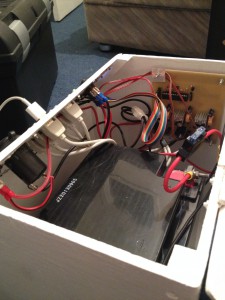
I just used scraps of cardboard I had lying around for this and some sellotape. My measurements were primarily based on the battery size and I had originally intended to just put the inverter on top of it. I changed my mind last minute and made the box wide enough for it to go to the side of the battery instead (you’ll see this space later). Suffice to say, the cardboard mock up did help iron out some problems before the final box was made.
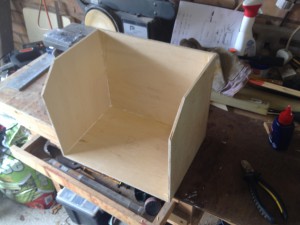
The wooden box
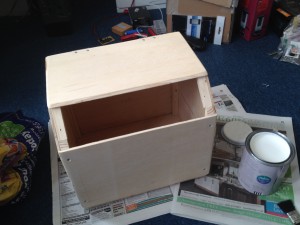
Just like the previous boxes, I opted for wood as my material of choice because it’s relatively cheap and easy to work with (not to mention easy to find) unlike plastic or metal. I chose 6mm plywood which seemed a bit thin at first but once put together it worked out just right.
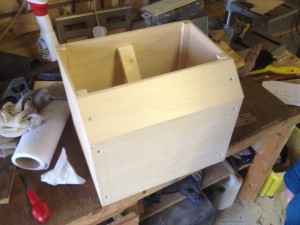
I chose to put the box together with small metal pins and wood glue. This was a delicate operation because of the thinness of the wood but with some help from a friend (actually he helped with pretty much all of it at some point or another!) we managed to put it together with only a few mistakes where the pins came through the wood where it shouldn’t. A little bit of wood filler fixed those mistakes. To further strengthen the box I put in 4 small corner posts which were glued in place and then 2 screws from each corner were put through to keep the sides on. To make sure the bottom was strong I made sure each side was tacked with pins into the bottom from the sides rather than it’s top where it could just fall out.
To protect the box from the weather, I painted it with some plain white gloss. It needed several coats before it wasn’t showing any wood colour through it.
The electronics
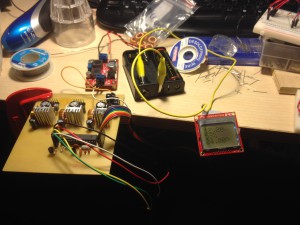
Probably by far the hardest part of the entire project was getting the electronics right. This has been in slow production since the beginning of the year. I was experimenting with power consumption for the LCD part of the circuit as this was planned to be on continuously. If the power consumption was too high then it would use too much power from the battery to be worth it. The LCD was to be used as a voltmeter (and percentage meter) and temperature. I had originally planned to put in a current sensor but this sensor turned out to be too low resolution and unstable to be worth implementing so I opted to leave it out.
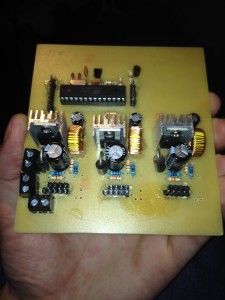
This board contains three 5v 3A switched mode power supplies with a resistor voltage divider for each of the data lines. This is set to allow the maximum current for any device plugged into the USB sockets. There is also an Arduino on board which is powered by a low quiescent current 3.3v regulator (standard regulators use about 5mA when idle, this one uses less than 1uA when idle which is a significant difference).
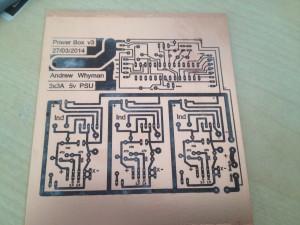
The whole Arduino circuit uses just an average of 2 to 3mA even with the LCD and backlight powered on. The backlight is using PWM to keep the brightness to the right level so that it can be seen in the day and night with ease. It took several attempts to get the circuit board to iron onto the board but after that it was mostly plain sailing.
A few minor fixes to the PCB were needed because the ironing process isn’t the best but with a little skill and patience these turned out not to be a problem. The one mistake I did make which I wish I had tested before making the board, was the spacing of components. The power connectors on the left side of the board were very close to one of the power supplies, and the diode and capacitor on the power supplies were a little close too. however I didn’t realise this until I’d already put most of the components on and soldered them so it was a bit late to go back and try again.
The front panel
The front panel layout was not something I thought about until I knew what size it was going to be. This was determined quite late in the build process.
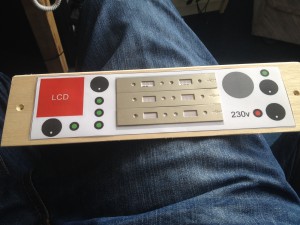
I decided to use the same process as the last power box and use photoshop plus real measurements to make my layout on the computer and then print it out in actual size. This makes moving things around to get the right layout much easier than drawing them on paper.
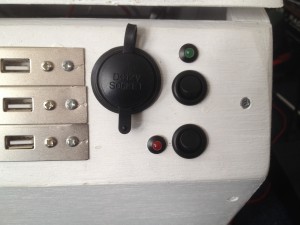
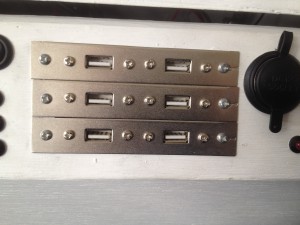
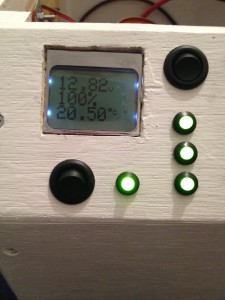
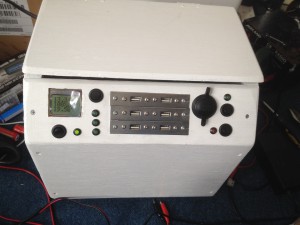
From left to right we have the LCD and main power button and LED, then a power switch for the USB sockets and 3 LED’s to show that the outputs are working. Then there are the USB sockets which are wired in pairs (left to right). We then have the cigarette lighter socket, it’s power switch and power LED, then under that we have a switch for the inverter along with a power LED.
I had to drill out each of the different holes with just the drill bits I had lying around of which they were far too small for the cigarette lighter socket and LCD, so I used a coping saw for the bigger holes. The LCD was a tight fit and I still haven’t figured out a way to keep it in place. Thankfully the LCD fights tightly to the point that it holds itself in, but a moderate push will make it come out. I don’t want to glue the LCD in just in case it ever needs replacing.
Above is the completed front panel and working LCD (this was running off a power supply for testing).
The arduino code
The arduino code was probably one of the biggest pains of this project. It should have been easy but because of the power consumption requirements I was forced to look into code that was help with power savings. The biggest power savings came from using 3.3v instead of 5v, and I also looked into using a lower frequency for the “CPU”. This arduino natively runs at 16MHz. This was much too high really for what this project needed. I looked into how it could be slowed down and it was actually quite easy. This circuit now runs at 1MHz for the majority of the time.
I say the majority of the time, but that’s where the problems started. The temperature probe I used runs on the OneWire library which is carefully coded to certain timings. These timings are only correct at 16MHz so of course at 1MHz it failed to work. I had to make sure that whenever the temperature updated that it returned to 16MHz whilst it probed the temperature and then it could return to 1MHz again. This happens for just a fraction of a second so power consumption is minimised.
There was also a problem which I found later and never really resolved which involved the voltage reading becoming wrong. I still don’t know why this happens but on occasion it would read incorrectly until the circuit was reset at which point it would be fine again for a random amount of time. To prevent this I ended up putting in if() statements to check the boundaries of values. If it went outside of boundaries it would initiate a reset. The easiest way to do this reset was through the arduino watchdog. This is a separate timer whose sole purpose is to reset the arduino if the timer expires. If the boundaries were exceeded, I initiated a delay that exceeded the timer so that it would reset on it’s own.
I originally set this to 2 seconds as it never took longer than 1 second to update – or so I thought. The box was completed the week before my camping trip to Silverstone for the racing so I took it with me for charging our phones. When we got there the LCD wouldn’t come alive, it kept rebooting. 2 seconds when it was colder wasn’t enough for it to initialise. Eventually it did end up starting but it was hit and miss. When I got home I changed it to 4 seconds but I haven’t had chance to test since. I imagine it is probably OK.
The end product
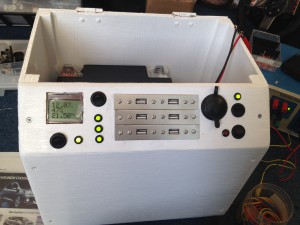
The final box is not actually complete. I still haven’t put the inverter into place as I haven’t figured out a way to keep it in place and I’m still not yet sure if I want to put it in. I’ll decide this at a later date.
As for the rest of it, the wiring for sure is much better than the last box and doesn’t look like random spaghetti!
So am I happy with the end product? Definitely. The battery capacity is almost half that of the last box but the age of the battery in the last box meant it was actually holding less than the new one! (90Ah which was really 33Ah vs the new battery which is 50Ah).
The total cost? I’ll be honest I haven’t kept a record but tallying it up off the top of my head it will be around £150 plus a lot of effort. You do have to remember that this is a bespoke product so nothing like it in this form exists.
There are some items missed off this write up such as the battery clamps etc, but I wanted to point out the finer details instead. And like I said at the beginning, I didn’t document it as I went along. This was all of the top of my head!

