USB voltage drop problems

Posted by under Electronics, on 5 August 2014 @ 7:21pm.

During use of the new power box, I found that it wasn’t charging some phones properly. In many cases when it was charging, if you attempted to use the phone it would slowly discharge. I put this down to the micro USB cables being inadequate or damaged, but recently I got a device which proved otherwise.

usb-charger-doctor

The USB charger doctor is a small device that sits between a USB socket and your cable. It shows you the voltage of the USB port and the current your device is drawing. This is useful in many respects from checking the voltage is in spec to seeing how much current your device draws under different conditions.

During my testing I found that my phone would only charge at around 0.48A and the voltage would dip to 4.5v. This voltage drop should never happen unless the regulator was being overloaded, which given it is capable of 3.0A I knew it wasn’t. The same happened for all 6 USB sockets on the power box. I also tested it on my PC and on the regular phone charger. The PC gave 0.5A (expected) and the phone charger gave 1.25A, it’s normal output current. But for the PC and phone charger, the voltage did not drop to 4.5v, it stayed around 4.9-5.0v.

This got me thinking about the current rating of the USB sockets I had used. The cables on the moulded sockets are fairly thin but should still be capable of 1.0A surely? My testing showed not. Under load, the regulator showed 5.0v but the charger doctor showed 4.5v at the socket, so the voltage is definitely dropping over the short length of cable from the regulator to the USB sockets.

I have no idea how to remedy this other than to use PCB mount sockets and run my own custom cables which I know will cope with the current I need. I tested a PCB socket and it managed 0.8A at the time of testing and with no voltage drop, so presumably that’s all the current the phone wanted at the time. This is still better than the existing sockets.

My biggest issue now is integrating the new sockets. I have decided to use dual USB sockets rather than singles but this shouldn’t matter massively. The ones I have ordered are not right-angled sockets but rather they stick straight up on the PCB. That will allow me to fabricate some form of mount for the front panel and hopefully make it easy to do with m3 screws.

In the mean time, I will probably just make up a temporary charging board and use the old 1A regulators from the first power box so we have some higher power sockets when needed.

I’m disappointed that I didn’t catch this earlier but that’s what prototyping and having this as a hobby is all about!


Power Box V3 – First proper use performance

Posted by under Electronics, on 26 June 2014 @ 10:26pm.

IMG_2812My recent holiday to Le Mans was the first time I’ve been able to properly test the new power box I built a few months ago. For those who haven’t followed the project the idea was to make a smaller more manageable box (one I could pick up without breaking my back) and one that had more USB sockets on it for charging devices. I also added a way to charge it through solar panels which came in very useful on this holiday.

I’ll start off by saying it performed better than I expected. There were 7 of us during the Le Mans trip and we were all charging something during the day whilst we were on camp. It charged phones and my tablet as designed, plus through the inverter, a Nintendo DS and a Laptop of some guys who caught up with us later in the week whilst they were travelling the country.

During the week I had my solar panels set up. At the moment I have a 10 watt panel and a 20 watt panel which are in parallel to give 30 watts. In order to use the panels I had to add a small charge controller to the box so that the battery didn’t get overcharged by the panels once it was full. This was a small modification that I planned to do once it was ready.

chargecontroller2

The charge controller is nothing special. It’s something I picked up years ago from Maplin when I was first getting into solar charging. Once it gets to 14.2v it cuts off charging and it comes back on again once it drops below 13.2v. It’s not a clever unit like some you can buy that pulse-width the charging to hold the charging voltage. These work much better than my unit, but they also cost more.

Now, 30 watts isn’t a lot but for such a small power drain as charging phones it was more than enough. The battery was almost fully charged every day even when using the laptop on the inverter for small bursts. At full output the panels can charge at 1.7A (at 12.8v this is almost 22w but since panels are optimised for 17v, 30w is not achievable without a different charge controller, but that’s another story). 22w is the maximum output I can expect from the 2 panels combined and I think this was regularly reached when we were in Le Mans.

It was certainly the center of attention for one person in the group who kept calling it her “pixie box”, and she kept asking if she could have some pixies for her Nintendo DS! Of course, I obliged!

The one issue I did have when charging is that all the micro USB cables I have seem to be broken or duff in some way. None of them seem capable of charging my phone whilst it is in use. It’s nothing to do with the box which can happily supply the power as I discovered it happens at home too! I’ve ordered a new cable to hopefully fix this. If it doesn’t fix it then I’ll assume it’s my battery booster case on my iPhone causing it.

All in all it was a success. The panels did their job keeping the box charged and it provided plenty of power for everyone to charge their phones.


24 Heures du Mans

Posted by under Life, on 23 June 2014 @ 8:51pm.
lemans

After visiting Silverstone for the WEC the last 2 years, this year I was persuaded by my friends to take a trip to Le Mans for the 24 hour race. For me this involved quite a bit of preparation since it’s the first time I had been out of the country for over 10 years. As such, my passport had expired and I had to go through the lengthy 8 weeks of trauma of applying for a new one – my first adult one as it happened. There is always the anticipation waiting for it’s arrival in case there was something wrong and they refused it. Thankfully for me nothing did go wrong and I got my renewal in plenty of time.

Going to France is quite a challenge for me mostly so because of the language barrier. I don’t speak much French at all. I can say hello, goodbye, thank you, count to 10 and that’s about it. Luckily for us, a friend of ours who went with us speaks fluent French so all was well on the translation front providing he was actually with you. He did require a bribe, though he never did stick to that (I’d best keep that quiet…!). This said, with pointers from my friends I managed to muddle through. Most of the people I had to speak to such as those in shops and restaurants actually spoke basic English too which helped when I got stuck. I’m sure they appreciate the effort we put in, but I really do need to learn more than a few words for next time.

Anyway, the trip was of course started with the car journey. I wasn’t looking forward to 12+ hours stuck in a car with only one other person for company. I don’t make a particularly good passenger at the best of times (I prefer to drive, but that wasn’t possible this trip). Sitting still for so long makes me ache, and ache I did after we got just half way down. I was fine once we got out of the car though.

tunnelcar

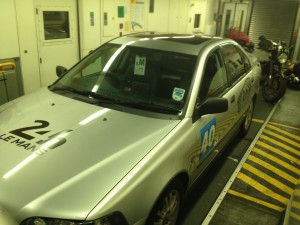
We took the channel tunnel coast to coast since it was the quickest way to get there and the journey was already long enough as it was without messing about with ferries. It was my first time on the train there so it was a new experience. I have to say it was a little different to what I expected but not unusual per se. You could get out of the car if you wanted to and walk around the carriage. I was under the impression you had to stay in the car when you were on it (that shows how little I bothered to look into it before hand too). It was nice to get out of the car for 30 minutes that’s for sure. Once we reached the other side it was back in the car for another 4-5 hours before we got to the town of Le Mans.

Driving on the wrong side of the road was a new experience. The last time I was abroad I didn’t have a driving license so I never paid attention to the roads much. This time it was different as I became aware of road signs that I had never seen before (though it was easy enough to work out what they were). The road layouts were different too, and as we found out there are some roads you’re not allowed to drive on too such as dedicated bus lanes! Thankfully it was 5am and nobody saw us except one guy in a hatchback…

A few hours before we got to Le Mans I was tired. I’d been up for 24 hours almost by that point and all I wanted to do was sleep. I did drift off in the car a few times but kept being woken up by either Radio Le Mans going to an ad break or the GPS warning us constantly that there are speed cameras on the road we were on (but no specific locations, we did it legally). Once we arrived I was as awake as I would be had I been asleep all night.

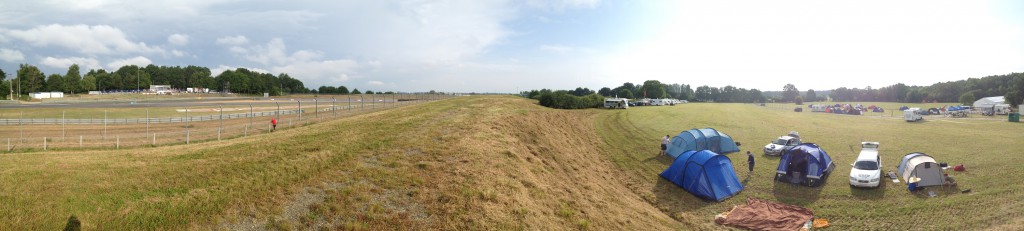
We set up the tents straight away in the hope of going to sleep. That sort of didn’t work out as by the time we put them up it was around 9am, the sun was up, and the inside of the tent didn’t take long to become like an oven. You try sleeping in a tent that is 40°C inside and you’ll see why! We abandoned that idea and set up our gazebo tent to shade us from the sun. After faffing about for a while we decided to go and get some breakfast from McDonalds and do some shopping.

camplemans

Ordering from McDonalds was my first use of French since we got there. My friends just told me to look for a meal on the board and then stick “menu” after it when you ask for it. Seems easy enough, and indeed it was. “Bonjour. McChicken menu s’il vous plait”. OK so that’s probably not totally correct French but it got me by. They could tell I wasn’t French and helped me out with a bit of English when needed, so all was well. The other guys had done this trip a few times and knew a bit more French than I did so they were a bit more accustomed.

I will tell you this, McDonalds in France is much nicer than in the UK. Everything feels fresher and less processed, plus when we ordered everything was made fresh. It hadn’t been waiting on the heated food racks for hours on end. While I wouldn’t have McDonalds for breakfast in the UK, it seemed almost normal in France. Plus it’s only while you’re on holiday so who gives one?!

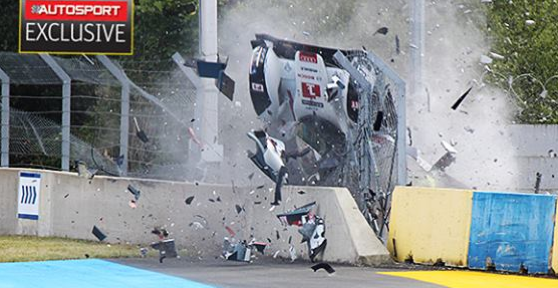
For the beginning of the week we didn’t do an awful lot. We hung around the campsite, we went shopping, but come Wednesday the practice sessions had started so we finally had some of the car action we came to Le Mans for. Even on day 1 we were not disappointed at lack of action at all. Audi wrote off their number 1 car in a spectacular crash (I didn’t witness first hand but saw pictures online). Thankfully the driver was fine, but he didn’t race this year (someone took over). Audi had to rush to rebuild the number 1 car by Saturday, and they managed it. Audi engineers at their finest!

audicrash


It was interesting to see other parts of the track, as that’s what we did on the evenings leading up to the 24 hour race on the Saturday. Some spots were brilliant for pictures, others were poor mainly due to the sheer number of people that were there trying to get a good view, or fences being between you and the track obscuring the view. I did manage to get a lot of good pictures which you can see on my gallery.

The main race on Saturday began at 3pm local time and would ride through to the same time the next day. I missed the start on the main straight and chose to watch it at Porsche curves instead. This was mainly because I was burning so much from the extreme sun we had all week. Even with SPF 50 sun cream it was still making it through. I did get a lovely tan off it by the end of the week along with some burning where I hadn’t applied as much sun cream than I did elsewhere. Watching from Porsche curves meant I could go back to the tent when I was getting too hot or I was burning again, since we were camping on the campsite there.

By the time the evening came we went to another part of the track for a couple of hours to enjoy the sunset views. I did get some pictures there but my entry level Nikon D3100 doesn’t have very good low light capabilities unless you go to silly high ISO levels. By doing that you get far too much noise in the image making for a terrible photo. The pictures I did take on a lower ISO didn’t come out well at all even with exposure compensation. Next year perhaps I’ll try a higher ISO anyway and see what happens if I have the same camera still.

When we got back to camp we went to bed. We had to endure the cars going past the whole night. While some people find it therapeutic, I don’t! I had some ear plugs and my radio ear defenders on to drown the noise out. It didn’t block it out completely but it blocked it enough to get some sleep. I probably managed about 4-5 hours sleep in total that night which is more than I thought I would get being a light sleeper and all. By the time it was 8am the sun was heating the tent up to an uncomfortable level and I had no choice but to get up.

Over breakfast we discussed what happened in the race overnight. As it turned out all of the LMP1 class cars had their own share of problems. Porsche were out with failures on both cars, Toyota suffered a complete failure of the electrics in one car and another was still behind after a crash earlier in the race, and Rebellion had minor issues throughout. Audi had both their remaining cars suffer turbo failures, but these were replaced and both cars were leading the field by morning. Needless to say it was a tense overnight race.

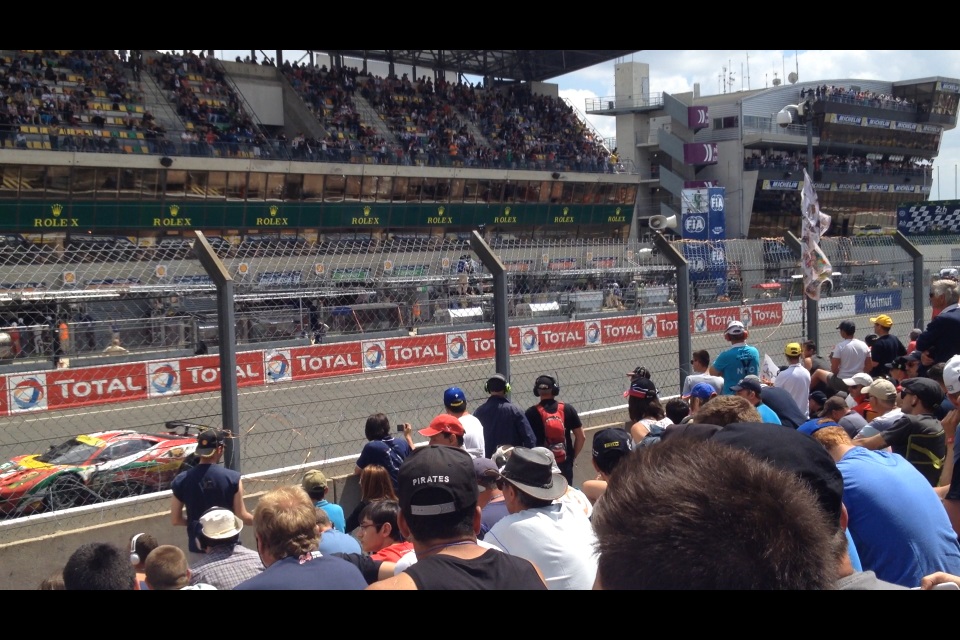
For the finish we went to the main straight after lunch. The sun was blaring again so I used an umbrella as a shade much to the annoyance of some people sat around me. Thankfully when my wallet decided to drop out of my pocket the guy behind me kindly pointed it out to me, so thank you strange man! It had all my money and debit card in it, so that could have ended up being quite bad. I think next year I’ll split it up and leave some hidden elsewhere or something as that could have been a disaster. I wouldn’t have been without money since I have friends to help out, but it would have been a horrible loss.

Finally 3pm came, and after a lengthy race, Audi took the two leading positions followed gracefully by Toyota then Rebellion. Porsche even managed to get a car out for the last lap too. Once the cars were in the pits everyone was allowed to pile onto the track for the closing ceremony. This is a lot different from Silverstone where they wouldn’t dream of letting you on the track at any point. Once that was over though we had a nice walk along the track back to the camp site. On the way we got to see some of the damage the Audi caused to the track wall when it crashed earlier in the week. There wasn’t much left except some large black marks but you could tell from those that it hit hard.

IMG_3102

The end of the race marked the end of the holiday in a sense. When we got back to the campsite everyone was packing up and leaving. There were only a couple of people staying the extra night. Going home the same day as the end of the race would have been far too tiring so we opted to stay overnight. We did pack most of the stuff that night to save time in the morning. To celebrate the end of another Le Mans the guys all said it was customary to have a fire, so that’s what we did. Anything that could burn that was going in the bin got burned! Sadly we quickly got told off by the ACO (the campsite owners) and they made us put it out. Oh well!

loot

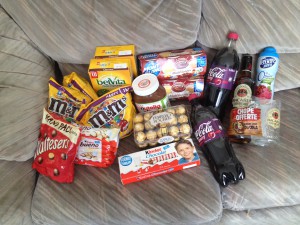
The journey home the next day definitely felt quicker than on the way down. Perhaps it’s because we didn’t spend the entire day awake before we left! When we got to Calais we went to spend the last of our Euros in the supermarket and stocked up on cheap wine, sweets and chocolate. Then in the channel tunnel we went into duty free and spent whatever else we had left.

All in all, I enjoyed the holiday a lot more than I thought I would. I’m still new to the sport of WEC but it’s growing on me every time I go to a race or watch one online. I definitely think I’ll be going next year! I’ll also be going to Silverstone again no doubt, and we were perhaps planning to do Spa as well. Time will tell as two trips abroad in a year will be expensive.


Power Box V3 Complete

Posted by under Electronics, on 1 May 2014 @ 11:04pm.

It’s been a while since my last post, but I haven’t been lying idle. I have actually got off my backside and completed version 3 of the powerbox that I mentioned in the last post. In this post I will attempt to show my efforts as I went along. I apologise for some of the awful photos as I didn’t think as I went along to document it properly so I’ll be doing this with what I took as I went along.

The cardboard mockup

You already saw this from the last post but I began this project with a cardboard mockup of what I wanted the final outcome to be. In the end my final product was a few inches bigger in all 3 axis to accommodate tolerances and to make sure I did have room for everything. I am glad I opted for this as it turned out well.

IMG_2623 IMG_2624

I just used scraps of cardboard I had lying around for this and some sellotape. My measurements were primarily based on the battery size and I had originally intended to just put the inverter on top of it. I changed my mind last minute and made the box wide enough for it to go to the side of the battery instead (you’ll see this space later). Suffice to say, the cardboard mock up did help iron out some problems before the final box was made.

The wooden box

Just like the previous boxes, I opted for wood as my material of choice because it’s relatively cheap and easy to work with (not to mention easy to find) unlike plastic or metal. I chose 6mm plywood which seemed a bit thin at first but once put together it worked out just right.

IMG_2683 IMG_2691

I chose to put the box together with small metal pins and wood glue. This was a delicate operation because of the thinness of the wood but with some help from a friend (actually he helped with pretty much all of it at some point or another!) we managed to put it together with only a few mistakes where the pins came through the wood where it shouldn’t. A little bit of wood filler fixed those mistakes. To further strengthen the box I put in 4 small corner posts which were glued in place and then 2 screws from each corner were put through to keep the sides on. To make sure the bottom was strong I made sure each side was tacked with pins into the bottom from the sides rather than it’s top where it could just fall out.

IMG_2712

To protect the box from the weather, I painted it with some plain white gloss. It needed several coats before it wasn’t showing any wood colour through it.

The electronics

Probably by far the hardest part of the entire project was getting the electronics right. This has been in slow production since the beginning of the year. I was experimenting with power consumption for the LCD part of the circuit as this was planned to be on continuously. If the power consumption was too high then it would use too much power from the battery to be worth it. The LCD was to be used as a voltmeter (and percentage meter) and temperature. I had originally planned to put in a current sensor but this sensor turned out to be too low resolution and unstable to be worth implementing so I opted to leave it out.

IMG_2696 IMG_2703 IMG_2704

This board contains three 5v 3A switched mode power supplies with a resistor voltage divider for each of the data lines. This is set to allow the maximum current for any device plugged into the USB sockets. There is also an Arduino on board which is powered by a low quiescent current 3.3v regulator (standard regulators use about 5mA when idle, this one uses less than 1uA when idle which is a significant difference).

The whole Arduino circuit uses just an average of 2 to 3mA even with the LCD and backlight powered on. The backlight is using PWM to keep the brightness to the right level so that it can be seen in the day and night with ease. It took several attempts to get the circuit board to iron onto the board but after that it was mostly plain sailing.

A few minor fixes to the PCB were needed because the ironing process isn’t the best but with a little skill and patience these turned out not to be a problem. The one mistake I did make which I wish I had tested before making the board, was the spacing of components. The power connectors on the left side of the board were very close to one of the power supplies, and the diode and capacitor on the power supplies were a little close too. however I didn’t realise this until I’d already put most of the components on and soldered them so it was a bit late to go back and try again.

The front panel

The front panel layout was not something I thought about until I knew what size it was going to be. This was determined  quite late in the build process.

IMG_2710

I decided to use the same process as the last power box and use photoshop plus real measurements to make my layout on the computer and then print it out in actual size. This makes moving things around to get the right layout much easier than drawing them on paper.

From left to right we have the LCD and main power button and LED, then a power switch for the USB sockets and 3 LED’s to show that the outputs are working. Then there are the USB sockets which are wired in pairs (left to right). We then have the cigarette lighter socket, it’s power switch and power LED, then under that we have a switch for the inverter along with a power LED.

I had to drill out each of the different holes with just the drill bits I had lying around of which they were far too small for the cigarette lighter socket and LCD, so I used a coping saw for the bigger holes. The LCD was a tight fit and I still haven’t figured out a way to keep it in place. Thankfully the LCD fights tightly to the point that it holds itself in, but a moderate push will make it come out. I don’t want to glue the LCD in just in case it ever needs replacing.

IMG_2723 IMG_2815 IMG_2814 IMG_2725

Above is the completed front panel and working LCD (this was running off a power supply for testing).

The arduino code

The arduino code was probably one of the biggest pains of this project. It should have been easy but because of the power consumption requirements I was forced to look into code that was help with power savings. The biggest power savings came from using 3.3v instead of 5v, and I also looked into using a lower frequency for the “CPU”. This arduino natively runs at 16MHz. This was much too high really for what this project needed. I looked into how it could be slowed down and it was actually quite easy. This circuit now runs at 1MHz for the majority of the time.

I say the majority of the time, but that’s where the problems started. The temperature probe I used runs on the OneWire library which is carefully coded to certain timings. These timings are only correct at 16MHz so of course at 1MHz it failed to work. I had to make sure that whenever the temperature updated that it returned to 16MHz whilst it probed the temperature and then it could return to 1MHz again. This happens for just a fraction of a second so power consumption is minimised.

There was also a problem which I found later and never really resolved which involved the voltage reading becoming wrong. I still don’t know why this happens but on occasion it would read incorrectly until the circuit was reset at which point it would be fine again for a random amount of time. To prevent this I ended up putting in if() statements to check the boundaries of values. If it went outside of boundaries it would initiate a reset. The easiest way to do this reset was through the arduino watchdog. This is a separate timer whose sole purpose is to reset the arduino if the timer expires. If the boundaries were exceeded, I initiated a delay that exceeded the timer so that it would reset on it’s own.

I originally set this to 2 seconds as it never took longer than 1 second to update – or so I thought. The box was completed the week before my camping trip to Silverstone for the racing so I took it with me for charging our phones. When we got there the LCD wouldn’t come alive, it kept rebooting. 2 seconds when it was colder wasn’t enough for it to initialise. Eventually it did end up starting but it was hit and miss. When I got home I changed it to 4 seconds but I haven’t had chance to test since. I imagine it is probably OK.

The end product

The final box is not actually complete. I still haven’t put the inverter into place as I haven’t figured out a way to keep it in place and I’m still not yet sure if I want to put it in. I’ll decide this at a later date.

As for the rest of it, the wiring for sure is much better than the last box and doesn’t look like random spaghetti!

IMG_2728 IMG_2812

So am I happy with the end product? Definitely. The battery capacity is almost half that of the last box but the age of the battery in the last box meant it was actually holding less than the new one! (90Ah which was really 33Ah vs the new battery which is 50Ah).

The total cost? I’ll be honest I haven’t kept a record but tallying it up off the top of my head it will be around £150 plus a lot of effort. You do have to remember that this is a bespoke product so nothing like it in this form exists.

There are some items missed off this write up such as the battery clamps etc, but I wanted to point out the finer details instead. And like I said at the beginning, I didn’t document it as I went along. This was all of the top of my head!


New Power Box Mock-up

Posted by under Electronics, on 23 March 2014 @ 11:22pm.
battery50ah
The new 50Ah SLA battery

If you’re familiar with my blog then you’ve probably read this post about my power box that I built for camping. It’s served it’s purpose well over the last couple of years, but recently I discovered that the battery was starting to get weak. The 90ah SLA battery inside is about 6 years old now and when tested I found it only holds 35% of it’s original capacity. Considering it’s size, it was time to replace it with a new one.

When going over ideas for the new box, I realised that 90Ah was probably a bit on the large side. Now that I have the 10W solar panel to go with it, the box didn’t really discharge much last year when we were camping as the solar was keeping it topped up. Therefore I decided to instead get a smaller battery as a replacement. What I settled on was a 50Ah SLA battery instead (see picture 1).

powerbox3

Old box vs new box mock-up

Now because this battery is much smaller than the 90Ah battery, I decided a new box was in order as well as the original is already way over-sized for what it’s containing. I found that the easiest way to design it was to make a cardboard mock-up so I could check everything fits (see picture 2). As you can see the size difference is huge, there is at least a 40% reduction. I decided to make it more compact than the first one. The original box was over-sized so that I could fit in various things like the solar panel (pure luck this fitted), lights, chargers, etc. This time I won’t be doing that purely for space reasons. There was a lot of wasted space inside it.

I’m able to make the front panel smaller on this new box too because I’m introducing the Arduino powered voltmeter (and temperature meter). This takes over the function of the LED bar on the old one. In fact, let me do a breakdown of the features this new box will have:

– Arduino powered voltmeter and temperature display (backlit)
– 6x 1-3A USB ports (current rating undecided at the moment)
– 2x cigarette sockets
– 5A solar charge controller + socket for the solar panel

Possible additions:
– 1x 600w power inverter  (undecided if I will include this)
– Outside access to the +/- terminals for jump-starting/charging

One of the biggest concerns I have at the moment is being able to fit the USB power supplies onto a single board. It will depend on whether I use 1A or 3A power supplies. The 1A power supplies have proven very reliable and all of them still work great. The 3A power supplies are essentially exactly the same, except it’s an LM2576 (3A) instead of LM2575 (1A). The biggest problem is heat. At 3A they generate a LOT of heat, 2A is the safest I can get away with using the same heatsink. However there is no way to limit them to 2A so I will be taking a risk by using the 3A supplies and splitting between 2 ports. Phones typically will only use 1A or less anyway so there shouldn’t be much of a problem. Finding one big heatsink for them all would be a nice option but heatsinks are hard to find in the right shape and size. So I am caught between which one to use. I will likely go 3A for simplicity and hope for the best (I.E. hope they don’t overheat), otherwise I need 6 supplies instead of 3. Both circuits use the same footprint regardless (minus a bigger heatsink if chosen).

usbports
The panel mount USB ports I chose from dx.com

The panel mount USB ports will be mounted on the front on the aluminium plate they come on for ease of mounting. I learned last time that they’re hard to mount so I’ll save the problems this time and just use the plate it comes on, plus it will keep them nice and steady and hopefully neat too. The header sockets it comes with also makes it nice to plug into my board if I properly design it to use the header pins. I’m thinking about neatness here as the last one was terrible. Considering I intend to take this across the border into France when I go to Le Mans it can’t look like an explosive device of any kind otherwise I might be questioned! Neatness also minimises risk of short circuits etc too.

For now this is about all I can add. I will be getting the plywood and paint etc, at some point in the next week or two after I get paid. Then it should take me a weekend or two to build the box after I make the final measurements, and then a week to do the electronics. After that it should be good to go! This needs completing ideally before I go to Silverstone but the old one will still be there if it’s not, otherwise it needs doing before Le Mans so I have plenty of time (just over 2 months).

I’ll post some more updates here when I do more work on it, including the schematics for the Arduino display if I remember.


Fiber broadband woes

Posted by under Life, Technology, on 6 February 2014 @ 11:02pm.

Up until about 2 weeks ago I was enjoying a lightening quick 80Mbps down and 20Mbps up from my BT Infinity 2 connection, but one day this all changed and I began to have problems. I noticed I was getting frequent disconnections which would cause my home server to stop pinging. Initially I consulted the BT forums to be told it was an issue with the BT Home Hub 5 firmware, however now I am not so sure.

About 2 weeks ago I was getting sick of the pings stopping, even though my connection felt relatively stable. I decided it was time to investigate further to see if it was a problem with my connection or the Home Hub. I started by running a piece of software called RouterStatsHub which allows you to graph your connection stats for easy troubleshooting. Immediately I noticed I had a drop in speed from my usual stable 80Mbps down to 65Mbps. My maximum line speed (the speed the line is capable of, not what you’re synced at) had also dropped from about 100Mbps to 80Mbps. This suggested a fault on the line somewhere.

I continued to investigate and I discovered that when I picked up the phone, or someone rang in, my noise ratios would plummet. This is consistent with a bad line too as it should stay perfectly stable regardless of whether the phone is in use or not. At this point I realised it was time to get a BT engineer to come and look at the problem. I called technical support and got a mid-week PM appointment.

I took a half day off work for the appointment. The slot was 1pm to 6pm, for which I was in for the whole time. 6pm came around and nobody had showed up! I was annoyed beyond belief so I called BT to find out why. Their online chat rep told me it was because they called to confirm but there was no answer, so the appointment was cancelled (!!!). They then called me and put me through to level 2 support who could arrange a new appointment. I asked them the same question and was told a different answer. They told me that nobody turned up because there were no resources available, IE they were completely over-worked and nobody was assigned. They didn’t think it was a good idea to bother telling me this! I asked what sort of compensation they would give for their missed appointment and was told £10 is all they will give… I had no choice but to accept it but I also asked about discounts but was told they can’t apply any until the fault is fixed. I have to call back to sort those out.

sat-noise
Engineer day: Terrible line noise and lots of
disconnections and shows when the
engineer started work

We finally got around to arranging a new appointment and I asked for a weekend slot. They told me they don’t work weekends. At this point I had already looked online and a friend also did and found that they did in fact do weekend appointments, so I pushed the issue. The rep said she would check again, and what do you know, there was a weekend slot available, two in fact! I could have an AM or PM appointment. Since I would be in all day I took the AM slot so the tech could have all day to work on my issue.

Saturday came around and he turned up at about 10.30am and got to work. He ran lots of diagnostics and listened to what I’d done to test the line. He spent all day trying to locate the problem but all he found was errors on the line. He was here until 5pm when he admitted defeat for the day and was going home. Unfortunately during his tests he had also switched parts of the line but couldn’t get it to sync again. This meant I was going to be without a connection until at least Monday. I was annoyed but I understood. I was thankfully able to utilise a neighbours BT FON connection, although this wasn’t particularly reliable due to the signal strength being low.

thurs-noise
Line noise after the fix, including
DLM decreasing the noise margin (lower is better)

Monday came around and the technician worked on the line again from about 2pm. About 3.30pm he called me to say I was temporarily back online but on 40Mbps instead. This was due to a fault in the green cab in the road which meant that some of the hardware needed to be swapped out. This wasn’t going to happen for a day or two though but at least I had a connection again.

Come Wednesday I was back on 80Mbps again but my sync is still only 67Mbps. This is due to DLM (dynamic line management) keeping my speed down until it’s satisfied my line is stable. This could take about 7-10 days to return to it’s full speed, which I’m now waiting for. However the fault is now fully fixed. I can pick the phone up and experience no drops at all in noise margin and my maximum line speed is above 90Mbps again.

I can’t say I’m 100% happy with BT’s response to my problem due to the missed appointment and no communication about it, but the technician I had did a fantastic job. He was polite, kept me informed and most importantly he kept to his word. From that perspective I couldn’t have asked for better support.


Fiber broadband

Posted by under Servers, Technology, on 24 December 2013 @ 9:30pm.

I posted a few weeks ago about me getting fiber broadband. Well its finally arrived after I called up to get an earlier appointment.

In was quoted 79.9Mbps and that’s exactly what I got on the sync speed. Speed tests give me 75Mbps down and 17Mbps up which is fantastic! The upload speed has already come in incredibly useful for sending files to friends quickly and uploading photos to my websites.

I’ve seen 9MB/s download on files from Microsoft and 2.1MB/s uploading via FTP. I’m certainly not going to complain at all for the extra £4 it’s costing me. I would highly recommend it to anyone who has FTTC available in their area. So far I’ve seen no throttling either which is brilliant. BT have a superior network to handle fiber so its not surprising.

I’m in the process of utilising it more and hopefully I will have a few servers on it soon. I’ll also be using it to download the 7.5TB backup of my site (yes, TB not GB!). I just need to get my 2nd server set up with the backup drives.


Fiber broadband is finally here!

Posted by under Life, Servers, Technology, on 4 December 2013 @ 11:45pm.

For many the fiber broadband revolution started many years ago. Those people that got virgin media for example were given quick speeds from an early age. Those of us stuck on ADSL however weren’t so fortunate. The line length was always a factor and prevented most people getting a fast connection. You would have to be no more than 500m away from the exchange to get anything over 15Mbps. Now that fiber is here that’s a thing of the past.

The new fiber cabs are no more than 200m away from most properties. And because it uses VDSL technology instead of ADSL you also get a bump in speed from that as well. It’s currently capable of 300Mbps with trials of higher in progress. Its something we should have got many years ago.

Anyway the point of this blog is that its finally arrived for me! I’ve been checking weekly for almost 2 years waiting to see the long awaited ‘available now’ message and this week it finally happened.

I initially signed up online and was given a date of early January. I was surprised by this as other people got theirs much faster. I decided I’d be OK with it as I understood they were quite busy. But after speaking to a friend who ordered at the same time as me he got his for next week! I asked how and its because he had phoned up and not done it online. I decided to try my luck phone up to see if I could get an earlier date. Thankfully they could! I was expecting a 2 week wait but they said they could do it next Monday! Brilliant!

I was expecting 65Mbps based on BT’s estimates which isn’t too shabby at all. But when I signed up the email I got said 79.9Mbps. I thought it might have been an error but checking their estimate page again it had been changed! So with any luck I’ll get the maximum that the up to 80Mbps package offers (the fastest package you can buy right now).

I’m just waiting for the BT home hub to come in the post in the next few days and then I’m all set. The engineer is scheduled for Monday to get it swapped and all working. Wish me luck! I’ll probably make another post with my speed test results soon enough!


I don’t like being ripped off!

Posted by under Electronics, Rants, on 17 November 2013 @ 1:16am.

A few weeks ago I bought some 81650 Lithium Ion batteries off eBay as I wanted to test them in a number of applications for some possible future projects. Before buying I had read some reviews on how poor these batteries often are in yielding the rated capacity, but I found a few sellers on eBay that didn’t have many negative feedback and decided they would probably be OK. I went ahead and bought them, and week later they turned up.

I already have a smart lithium charger that was capable of telling me the capacity of the batteries when they had been charged (basically how much power it had put in them during the charge cycle). This is all I needed to test them but I also recently got a power meter that could do the same when discharging them too. I set to work trying to check them but immediately I knew something was wrong. I started a discharge with a 0.5A load and the voltage dropped very quickly. I first thought this was due to them being flat already so I decided to put them on charge first. I set the charger up for 3000mAh capacity and a maximum 3A charge rate, which is normal for these batteries. I set the charger going but immediately the voltage hit 4.2v and only pushed about 0.4A into the battery. I gave it the benefit of the doubt and let it charge anyway.

ultrafire-vs-trustfire

My limited experience shows Ultrafire have low capacity compared to Trustfire. Not all scenarios might turn out this way.

15 minute later the charger beeped to say it was fully charged. That was way sooner than I expected. I looked at the charge capacity and it was small. I don’t remember the figure but it was under 150mAh. So anyway I repeated my original test and let it run at 0.5A for a little while. The same voltage drop happened but I let it run. Less than 30 minutes later the batteries were showing 2.5v/cell, which is dead. My discharge meter read 210mAh! This is over 20x less than the rated capacity. I repeated the charge and discharge test a few times to be sure but it wasn’t changing.

As it turns out, these batteries were all duffs. They likely came out of old laptop batteries or similar, got re-labelled and shipped out as new. It’s safe to say I was pretty miffed at being ripped off. I wasn’t going to get stuck with them so I contacted the eBay seller who was happy to help. He asked me how I tested them so I told him and I even gave him the make and model of my charger and power meter. He didn’t argue he simply asked if I’d like a full refund, to which I agreed. He didn’t even want the batteries back. Something tells me he knew they were bad, despite the fact he told me he’d never had returns on them before. All 4 batteries that I had bought came out the same. Had it been one bad one I wouldn’t have been too bothered.

Anyway, I was refunded on the duff batteries so I set about looking for better ones. I decided to look on one of my favourite online shops, dx.com. I’ll be up front and say it’s a Chinese site but with a difference. The stuff they sell is actually half decent and they are much lower priced than other places. I’ve never had a bad purchase from them to date and I’ve bought a dozen things from them.

It didn’t take me long to find some batteries on there with good reviews. They claimed 2400mAh out of the rated 3000mAh. While not perfect it was a lot better, and the reviews were from people who had bought them too so I was inclined to follow them. Knowing the site has been good in the past helped too, so I didn’t hesitate to buy them. They took about 2 weeks to arrive and they came today. I did a quick initial charge, and then set about discharging them with the same 0.4-0.5A load I did with the others. It took a while, but I eventually ended the discharge test with a 2300mAh result. I then charged them and got the same amount put back into the batteries.

Success!

In case you’re wondering, I originally bought “Ultrafire” batteries which are cheap knock-offs of the “Trustfire” ones I bought in the end and they worked. My advice here would be to steer clear of Ultrafire and stick with the better brands like Trustfire. Better still, you could buy Sony batteries or another well known brand.


When other peoples problems become my problem

Posted by under Life, on 30 October 2013 @ 9:39pm.

The past couple of days have been pretty much normal except for one thing. Twice in two days other peoples problems have been translated into something that became my problem. I’ll admit straight away it was me that made it my own problem, however let me explain why as you can probably relate.

Take scenario one. I was aware of a situation where someone walked out in work. Later it was brought up in conversation and suddenly the person snapped at me like I had said something offensive. At this point all I knew was I managed to piss the person off and I got lashed back at for it. I don’t deliberately piss people off of course, sometimes it just happens. If I was pushing a point I’d understand getting snapped at, but I wasn’t. It was the first time I had mentioned it and it happened completely without warning. Not only did it take my by surprise but it was embarrassing too. Thankfully for me the lash back was said quietly and without a fuss but there were a few people who heard it. Some of them later agreed it was out of order but as it didn’t involve them there was nothing they could do.

The second scenario was in reply to something I said to a colleague over Facebook as a reply to a status they posted. Someone thought it appropriate to tell me that my reply had a lot of things wrong with it (in their opinion of course) and that they didn’t know where to start. I politely asked them to tell me privately what the problems were. I was confronted with a lecture on what I should and shouldn’t have said to this person given the situation. Now I don’t mind being given advice but being plain and simply told what I did was wrong and being snotty about it is just insulting. The way I came across may not have been the best but it certainly wasn’t intended to insult the person I was talking to, and apparently telling the truth no matter how much it hurts or how inappropriate it might be is completely wrong in the eyes of the person I got the lecture from.

I took both of these personally and eventually decided enough is enough. I have now removed nearly all of the people I work with from Facebook except for those I actually consider a friend and not just a colleague. There is a fine line between work and home and it got well and truly crossed in the last few days. Even though only one was an actual confrontation I don’t see any reason to keep these sorts of relationships outside of the workplace. In future though, it would be a good idea for those who have personal issues to keep them out of the workplace too. But that’s just my opinion of course.

As a final note to anyone who works with me, I don’t hate you and I don’t want to hate you, but maybe you could keep your own issues to yourself and perhaps be a bit more tactful on how you approach problems you have with me or something I’ve done.


« Newer PostsOlder Posts »